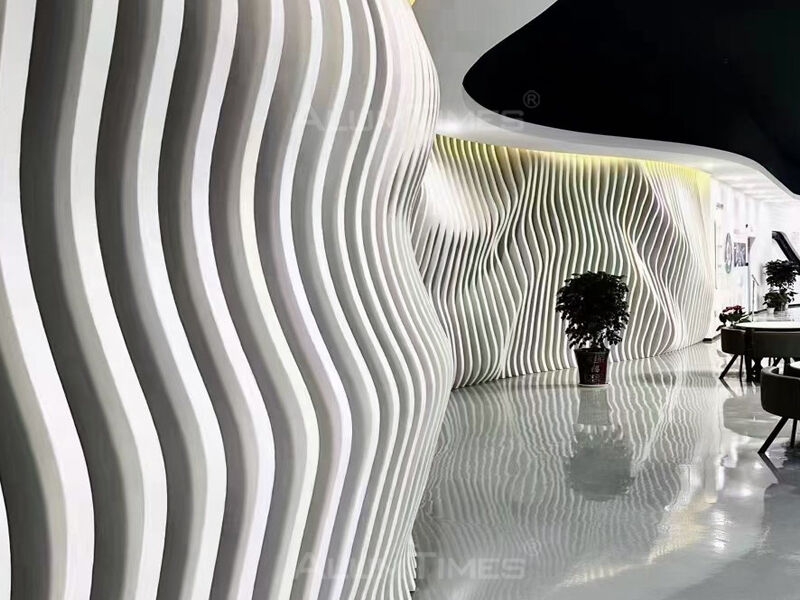
Why Interior Decorative Baffle Wall Panels Deliver Dual Acoustic and Aesthetic Value
Modern interior design no longer treats acoustics and aesthetics as separate concerns. Interior decorative baffle wall panels bridge this gap by absorbing excessive reverberation while serving as a visual design element. These suspended baffles trap sound waves through their porous material structure, reducing noise levels by up to 60% in open-plan offices and dining areas. Unlike bulky soundproofing foam, they come in sleek geometric shapes, vibrant colors, and varied textures that complement any interior theme—from minimalist to bold artistic statements. The dual functionality also extends to thermal insulation, helping maintain a comfortable indoor climate by minimizing heat loss through walls. For commercial spaces like conference rooms and restaurants, improved speech clarity directly boosts productivity and customer satisfaction. Residential users benefit from quieter home theaters and private workspaces without sacrificing style. By choosing decorative baffle panels, you invest in a solution that simultaneously enhances sound quality and elevates room design—proving that noise control and beauty can coexist harmoniously.
Pre-Installation Essentials: Tools, Materials, and Wall Readiness
Critical tools and safety gear for precision cutting and secure mounting
Before handling any interior decorative baffle wall panels, gather a complete toolkit to avoid workflow interruptions. Essential items include a tape measure, spirit level, and chalk line for accurate layout. For cutting, use a fine-tooth circular saw or handsaw to prevent splintering. A drill with screw bits, construction adhesive, and a caulking gun are required for secure mounting. Panel spacers and edge trims ensure consistent gaps and a polished finish. Safety gear—gloves, goggles, and a dust mask—protect against debris and adhesive fumes. A stud finder helps locate solid anchor points, especially on drywall. Having everything ready before starting streamlines the process and reduces errors.
Wall substrate assessment: drywall, concrete, and timber—preparation protocols and anchoring best practices
The substrate determines mounting method and fastener type. For drywall, confirm it is smooth, dry, and free of damage. Patch holes with spackle and sand flush. Use a stud finder to mark studs; anchors alone may not hold baffle weight. On concrete or masonry, drill pilot holes and insert expansion anchors rated for the panel load. For timber walls, ensure the surface is level and free of protruding nails. In all cases, clean the wall thoroughly to remove dust and grease so adhesive bonds properly. If the wall is uneven, apply a smooth plywood or MDF base layer first. Proper substrate prep prevents sagging, gaps, and code violations later.
Precision Layout and Alignment for Optimal Acoustic Performance
Achieving superior acoustics with interior decorative baffle wall panels requires precise layout and alignment. A symmetrical grid ensures balanced sound absorption across the room. Begin by locating first-reflection points using the mirror trick: sit in the primary listening position and have a partner slide a mirror along the wall; where you see the speaker, place a panel. This method dramatically improves clarity and reduces flutter echoes.
Symmetrical grid planning using first-reflection point analysis and manufacturer-recommended spacing (300mm H / 220mm V)
For consistent performance, follow the manufacturer's recommended spacing of 300mm horizontally and 220mm vertically between baffles. This spacing aligns with typical sound wave behavior, preventing gaps that allow sound to bypass the panels. Use a laser level to mark the grid on the wall, ensuring all panels are level and evenly distributed. Symmetry across opposite walls is critical—uneven placement can create unbalanced reflections and diminish acoustic benefits. By combining reflection-point targeting with standardized spacing, you maximize the noise reduction coefficient while maintaining a clean, professional aesthetic.
Secure Mounting and Panel Attachment: Methods, Metrics, and Code Compliance
Batten vs. direct-mount systems: load capacity, fire-rating alignment (ASTM E84 Class A), and substrate compatibility
The mounting method you choose significantly impacts both aesthetic appeal and the long-term acoustic performance of interior decorative baffle wall panels. Two primary systems dominate: batten frameworks and direct-mount installations. The following table outlines their key differences across critical metrics.
| Feature | Batten System | Direct-Mount System |
|---|---|---|
| Load Capacity | High; distributes weight across a subframe, supporting heavier panel configurations. | Moderate; relies entirely on the wall substrate's integrity. |
| Fire-Rating Alignment | Easier to achieve ASTM E84 Class A; battens create an air gap that improves flame-spread performance. | Requires careful adhesive selection; direct contact may necessitate fire-rated adhesives. |
| Substrate Compatibility | Works well on uneven surfaces (e.g., concrete, timber) by shimming the batten. | Optimal only on perfectly flat, structurally sound drywall; poor for masonry. |
For drywall substrates, a batten system provides fail-safe anchoring, whereas concrete walls benefit from direct-mounting with pre-drilled holes and expansion anchors. Always verify that the chosen system aligns with the wall’s fire-rating requirements. The batten method introduces an air gap that helps achieve a Class A rating under the ASTM E84 standard—a crucial factor for commercial code compliance.
Adhesive vs. mechanical fastening: real-world shear resistance data (42% gain with pre-inserted anchors + baffle hooks)
When securing the acoustic panels, the choice between adhesive-only and mechanical fastening determines long-term stability. While construction-grade adhesives offer a clean, seamless finish, they provide limited shear resistance under stress. Field tests show that a hybrid approach delivers superior results. Using pre-inserted anchors combined with specialized baffle hooks yields a measurable 42% gain in shear resistance compared to adhesive alone. This mechanical method is non-negotiable for high-traffic zones or ceilings, where panel weight and potential vibration demand a fastener-grade hold. Always allow adhesive to cure fully (typically 24–48 hours) before releasing the applied pressure, and torque mechanical fasteners to the manufacturer’s specified value—under-tightening permits movement, while over-tightening can crack the panel.
FAQ Section
What are baffle wall panels used for?
Baffle wall panels are used for improving acoustics by reducing reverberation while serving as decorative interior design elements. They can also provide thermal insulation.
How do you install baffle wall panels?
Installation involves assessing the wall substrate, precise layout planning, and secure mounting with either batten systems or direct-mount methods. Tools like a drill, adhesive, and mechanical fasteners may be required.
Can baffle wall panels be customized?
Yes, baffle wall panels can be customized in shapes, colors, and textures to match specific interior design themes.
What types of substrates are best for mounting?
Drywall, concrete, and timber are common substrates, but they require specific preparation protocols, such as cleaning, patching, and using anchors or battens for uneven surfaces.
Are baffle panels fire-resistant?
Some baffle wall panels can achieve fire-resistance ratings, especially when installed with batten systems that create an air gap to enhance flame-spread performance.
Table of Contents
- Why Interior Decorative Baffle Wall Panels Deliver Dual Acoustic and Aesthetic Value
- Pre-Installation Essentials: Tools, Materials, and Wall Readiness
- Precision Layout and Alignment for Optimal Acoustic Performance
- Secure Mounting and Panel Attachment: Methods, Metrics, and Code Compliance
- FAQ Section